Most of the time I don't know how I am going to alter a piece until I do it. I look at the form, turn on some loud music and just dig in. For me the process is very improvisational. I make it up as I go.

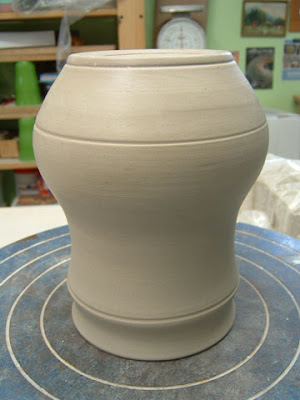
Here is a "blank" covered jar. It has been trimmed and is at a firm leather hard state.

I decided to start carving at the bottom of the piece. I work on pots upside down all the time.

I was able to carve the continuous spiral by using my banding wheel and a small wire loop tool. I used the corner of a square wooden drawer knob to pierce the bottom foot in 5 places.

Next I moved to the lid. I used two wire loop tools to carve the outer pattern. Then I used the round end of a broken off TV antenna to hammer the pebble pattern. It seemed like a good idea to pierce the rim of the lid in 5 places too.

I liked the 5 cuts in the rim and the foot. That lead me to divide the jar's middle section into 5 sections too. After that I decided to create vines. The cuts echo the pattern on the lid.

I used a fine wire loop tool to refine the edges of the leaves. Next I decided to pick up the pebble pattern over the surface. The vines popped out as a result.

These are small clay spirals. I made them by pushing clay balls into a little bisque mold of a button.

I scored the surface of the pot with a knife before I applied the clay spiral. The underside of the spiral is scored too. They are joined together with distilled white vinegar (which I prefer to slip).

I threw 5 different knobs so I would have lots of options. I will use the extra knobs for other pieces.

After looking at the jar with all 5 knobs I choose this one. Here is the completed jar with the knob in place.

A top view.

The textures look gorgeous at this stage while the clay is still leather hard.
7 comments:
Awesome photo series. Love how your spiral button sprigs become the bloom or top on the plants.
I didn't plan on that part, but it made me smile when I tried it. My pieces seem to be more successful when I "go with the flow" and see where I end up. Thanks for all your nice comments Patricia. It's good to know someone is reading this thing.
Stunning work. Please be sure to show it off after it's glazed!
Great photo series, Amy! If only all demos were this clear to follow, that would be wonderful.
As someone that has also pebbled surfaces (I use the end of my needle tool) I know it takes quite a bit of time to do a large surface. Yours turned out so well. I always like your organic/manmade surfaces, especially in the leather sage, but then the glazes really make the piece jump!
-C Yalater
This is fantastic as it shows your thinking process. Do you know what glazes you are going to use at the beginning, or decide after you finish the piece? Also, it would be nice to see a picture of the tool that you are using to pebble the design. I can't remember what a TV antenna looks like!?!?!?
thanks,
Connie
Hi Connie,
I do not know for certain what glazes I will use on a piece when I make it. I do use a fairly limited glaze pallet, so it will most likely be a combo of the glazes you have seen in earlier posts. I am planning a similar post of another piece I just finished. I will include a photo of some of my tools. Thanks for the questions and nice comments.
Great demo and beautiful work Amy, can't wait to see this piece fired.
Post a Comment